Hello friends,
Let do something difficult now…
We are going to design an easy Id-Card using Microsoft word 2013. Put on your
thinking cap now because we are going to do some thinking!
Designing with Ms word is kind of
stressful and hard but if you know your way around it, it won’t be that
difficult - believe me.
What I use majorly in designing
with Ms word is Text Box. Why? Because
it enables me move text around anyhow I want. So let’s get started… designing all
the way!
What you need
Steps
1. Go to Insert then click shapes. Choose the text box (the shape shape with
the logo having an A) and draw a
rectangle.
2. After drawing the rectangle, go
to size at the top right part of the screen (in format tab) then make the
height = 8.13 while the breath = 5.59. huhala! You have gotten the id card
outer box shape.
3. Now click on the outline of the
box then do Ctrl + d to duplicate
it.
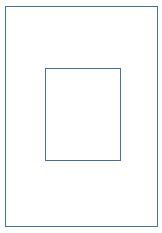
4. Reduce the size to a passport
size and put it at the middle of the first rectangle created.
5. Insert a text box then remove the
outline and fill colour.
6. Now write the company name there. In this tutorial, the name
of this blog was used. So, you can write icrosoft
office in the box. Notice that the M is not there. We are going to create
the M with another text box.
Font type – Berlin San FB
Font Size – 14
Colour – Orange
Outline – Black
Font Size – 14
Colour – Orange
Outline – Black
7. Create another text box (with no outline and fill colour) for
the letter M. type M in it.
Font
type – Joker Man
Font Size – 22
Colour – Orange
Outline – Black
Font Size – 22
Colour – Orange
Outline – Black
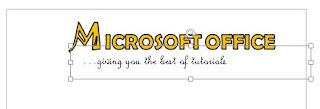
8. Now place the two of them
together inside the outer box like this. Check picture below. (the arrow
indicates the outer box)
9. After that, duplicate the icrosoft word text box for the slogan. Erase the previous text in
it and type “…giving you the best of tutorials”.
Font type – French script MJ
Font Size – 10
Colour – black
Font Size – 10
Colour – black
10. Do the same for the address, telephone number and email
Font type – Calibri
Font Size – 6
Colour – black
Font Size – 6
Colour – black
11. Create another text box for the “Helps” close to the Microsoft Office to complete the company’s names.
Font type – Freehand 521 BJ
Font Size – 10
Colour – orange
Font type – Freehand 521 BJ
Font Size – 10
Colour – orange
12. Drag and place at the right hand side of the Microsoft word. Check pics below
Now, let’s do below. Go back to the Email text box, click on
it, then duplicate it. Drag it down (below the passport box) then edit the
text. Write the name of the employer/employee.
Font type – Calibri (bold)
Font Size – 14
Colour – black
Font type – Calibri (bold)
Font Size – 14
Colour – black
13. Duplicate it again for the position held and “sign”.
Font type – Calibri
Font Size – 10
Colour – black
Font type – Calibri
Font Size – 10
Colour – black
14. For the bottom, create a box then duplicate it. Place them side by
side at the bottom of the outer box of the id. Paint the first box Orange and the second Yellow.
Duplicate a text box at the bottom (either the sign text box
or the name of the employee or employer).
Font type – Calibri (bold)
Font Size – 11
Colour – white
Font Size – 11
Colour – white
15. Type IDENTIFICATION CARD in it and place it at the middle of the box explained above (the painted box).
16. Scan and place your signature.
17. Insert your company logo
18. And insert your passport. Loolzzz
don’t mind my passport, during the drafting of this tutorial, I couldn’t get my
passport, so I had to sketch something for this. Looks like me though lolz lmao
19. You are missing something right?
I sketched a little shape which I placed at the back of the passport.
to do this, go to insert then click shapes. Choose Scribble (scribble is just like freehand pencil in corel draw).
to do this, go to insert then click shapes. Choose Scribble (scribble is just like freehand pencil in corel draw).
20. Now use it to sketch exactly this
shape below. Duplicate the shape and mirror it.
21. Paint one light yellow and the
other light orange
22. Place in them both behind the
passport box, infront of the outer box. Use the Bring Forward and Bring backward function wisely here. (to locate
that, go to the format menu and check the right corner.
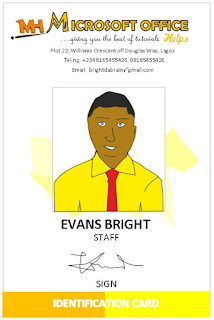
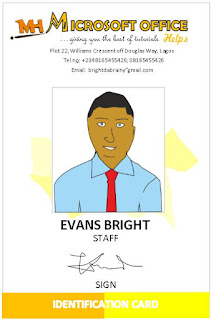
23. Place them well just like mine
and this will be your final result!
Hope you got it? Let me see your
image in the comment region…


great my fellow blogger check my blogs too
ReplyDeleteThanks, that worked beautifully. How do I show you the picture of the ID card in the comments?🤔
ReplyDeleteI love how detailed and clear this post is. You’ve really outdone yourself!
ReplyDeleteYour step-by-step guide for designing an ID card in Microsoft Word is wonderfully detailed—especially the clever use of text boxes for precise layout control. It’s really helpful how you break down sizing, layering, and styling choices, which makes what seems complex totally approachable even for beginners.
ReplyDeleteThis hands-on design approach reminds me how identity documentation is evolving in the real world too. In the Philippines, the PhilID not only represents physical recognition but also embodies a unified id size framework. It’s fascinating how innovations bridge creativity with functional access, whether you're crafting an ID in Word or navigating government and private services securely and efficiently.